Complete Guide to Removing Programs from Windows 11
Is your Windows 11 computer running slowly due to cluttered storage? It’s time to learn how to properly remove unwanted software and optimize your system’s performance.
Why Remove Unnecessary Programs?
Removing unused software provides several key benefits:
– Frees up valuable disk space
– Improves system performance
– Reduces security risks
– Prevents system crashes
Before You Begin
Take these important precautions:
– Back up your important files
– Create system restore point
– Document any product keys
– Check for system errors
Step-by-Step Uninstallation Guide
Method 1: Using Windows Settings
1. Open Windows Settings
2. Navigate to Apps > Apps & Features
3. Find the program you want to remove
4. Click Uninstall and follow prompts
Method 2: Control Panel
The traditional Control Panel method remains effective:
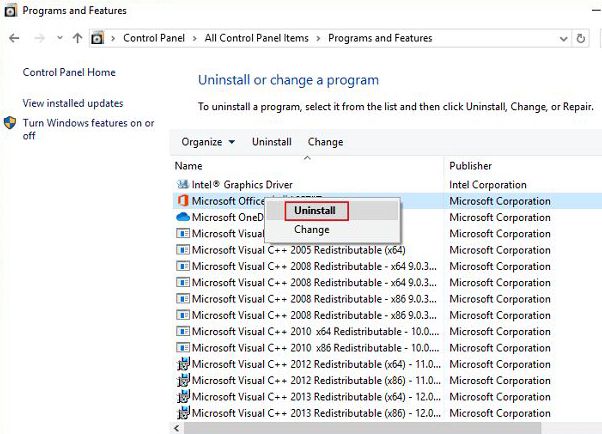
1. Open Control Panel
2. Select Programs and Features
3. Right-click program to uninstall
4. Follow uninstallation wizard
Cleaning Up After Uninstallation
After removing programs, consider these steps:
– Delete leftover files
– Clean registry entries
– Review startup programs
– Run system optimization
Best Practices for Software Management
Maintain your system’s health by:
– Keeping Windows updated
– Running regular virus scans
– Managing software updates
– Regularly reviewing installed programs
Need Help Managing Your Windows System?
Geeks On Command provides expert software management through remote computer repair nationwide and in-person service throughout New Jersey and Boulder, CO. Our RSAG-accredited technicians can optimize your system and ensure proper software removal. Currently offering 20% off all hourly services. Call (201) 400-0936 to schedule your appointment today.