Backing Up Data from a Non-Bootable Hard Drive
Backing up data from a non-bootable computer can be a challenging task, especially for those who are not familiar with computer hardware. However, with clear instructions and the right tools, you can safely transfer your data to an external hard drive. Here’s a straightforward guide to help you through the process.
What You’ll Need:
- A Working Computer: You’ll need access to a computer that is functioning correctly.
- External Hard Drive: This is where you’ll store your backed-up data.
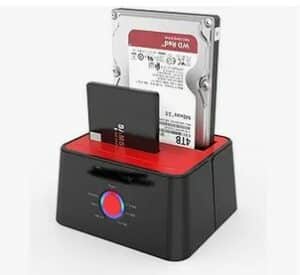
- USB Docking Station or External Hard Drive Enclosure: These are devices that allow you to connect your internal hard drive to another computer via USB. They are sometimes called HDD/SSD enclosures or docking stations, and are available for $25-$50 on Amazon (click here to view hard drive docking stations on Amazon).

- Screwdriver: To open your computer case and remove the hard drive (if necessary).
Steps to Follow:
- Remove the Hard Drive from the Non-Working Computer:
- Unplug the computer from power.
- Open the computer case using a screwdriver. For laptops, this usually involves unscrewing the back panel. There are often guides to how to open specific computers if you search YouTube for your specific computer model + the words hard drive replacement.
- Locate the hard drive. It’s a rectangular metal box inside the computer (3.5 inches for desktops, 2.5 inches for laptops).
- Disconnect the cables attached to the hard drive, remove any screws holding it in place, and gently remove it from the case.
- Connect the Hard Drive to the USB Docking Station/Enclosure:
- Attach your hard drive to the docking station or place it inside the enclosure, making sure it connects securely to the internal connector.
- Plug the docking station or enclosure into the working computer using a USB cable.
- Access the Drive on the Working Computer:
- Power on the working computer and let it boot up.
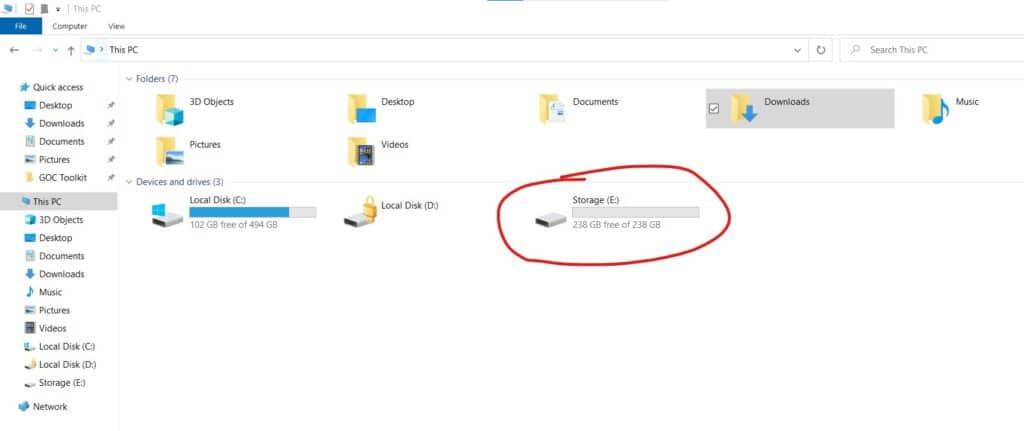
- The computer should recognize the hard drive as an external device. It will appear as a new drive under “This PC” in File Explorer.

- Transfer Data to the External Hard Drive:
- Connect your external hard drive to the working computer. The computer should recognize this hard drive as an external device that will also appear as a new drive under “This PC” in File Explorer (with a different drive letter).
- Open this external hard drive in a separate file explorer window (so both drives are now open in their own window).
- Open the folder with the docked drive, navigate to the “Users” folder, then open your personal username from the new window.
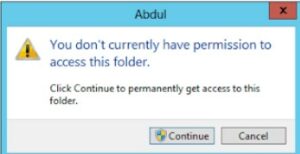
- Once you’ve opened the user folder for your username, you can select all the visible folders, then copy and paste them to the external hard drive folder in the other window to start transferring your data.NOTE: If you encounter permissions errors while trying to access files, simply click continue and wait (a long time sometimes) for your computer to grant itself ownership of the drive.

If this method was unsuccessful, you can also try:
- Right-click the icon for the hard drive in the “This PC” folder, then select Properties.
- Go to the Security tab and look for the user name or group section.
- If you do not have access to that folder, click the Advanced button.
- Once in the Advanced Security Settings window, go to the Owner section at the top, then click the Change link. Doing so should bring up the User or Group window.
- Once the User or Group window is up, choose Advanced.
- Enter your User Account name, then click Check Names. You can also click the Find Now button. Once you see the list of available accounts, choose your account, then click OK.
- Remember to select the “Replace owner on sub-containers and objects” option, then click OK to save the changes.
- Safely Eject Both Drives:
- Once the transfer is complete, safely eject the internal hard drive and the external hard drive from the working computer.
Tips:
- Be Gentle: When handling hard drives, be gentle and avoid shaking or dropping them, as they can be damaged easily.
- Static Precautions: Avoid static discharge by grounding yourself before handling the internal hard drive. Touching a metal object can help.
- Labeling Cables: If you’re uncomfortable with technology, take pictures or label cables before disconnecting them to ensure easy reassembly.
By following these steps, you can successfully back up your data from a hard drive that’s in a non-bootable computer. Remember to handle your hardware with care and take your time through each step.
